Posts Tagged ‘android’

Configure Your Email Address On Your Android Device

HostScripter Clients through HostMailBox

1. Click on the Applications / Menu button on the Home Screen of your Android Device

Picture

2. Open the ‘Email’ Application.
Picture

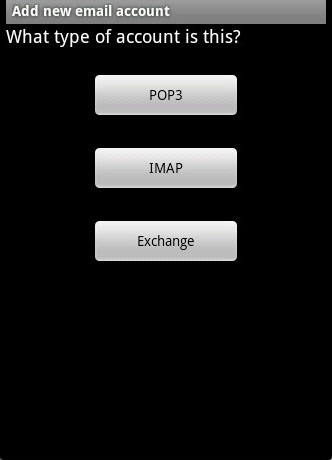
3. Select the Account Type as either ‘POP’ or ‘IMAP account’. (Recommended Configuration – IMAP)
Picture

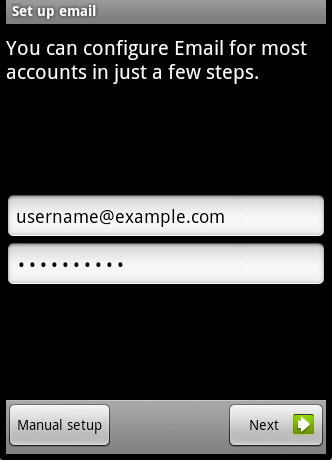
4. Enter your Email address & Password > Click on Next
Picture

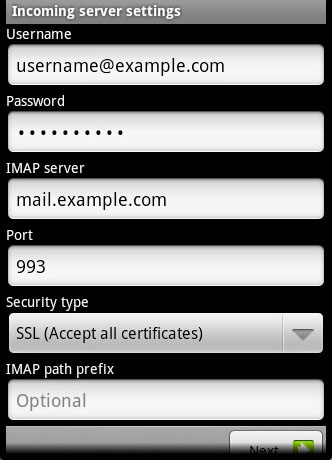
5. Enter the information as per the instructions provided on the following screen:
User name: <Complete Email address>
Password: <Email Password>

*** For IMAP Configuration
IMAP Server:
imap.your-domain-name (eg: imap.yourdomain.org)
Port: 143

*** For POP Configuration
POP Server:
pop.your-domain-name (eg: pop.yourdomain.org)
Port: 110

Security Type: None
Click on Next

Picture

6. Enter the information as per the instructions provided on the following screen:

SMTP Server:smtp.your-domain-name (eg: smtp.yourdomain.org)
Port: 587
Security Type: None
Require sign-in: Keep in marked/ticked
Click on Next
User name: <Complete Email address>
Password: <Email Password>.
Click on Next

Picture

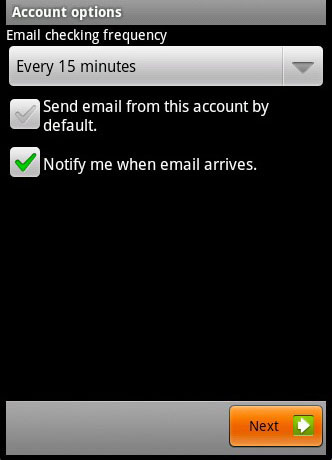
7. Select ‘Email check frequency’ ‘Notify me when email arrives’ as per your preference.

Picture

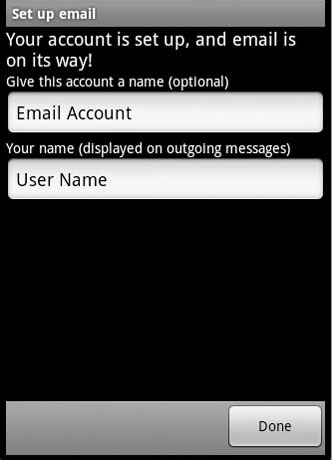
8. Give an account name for the configuration (optional).
Enter Your Name and click on Done.

Picture

9. You have successfully setup an email account on your Android Device.
You may try sending/receiving a test email from the email application.
Picture
Source: HostMailBox.com

How to setup email in Android devices?

Source: JustHost.com

This article will show you how to setup email on a device running the Android OS.

Create a new email account


  1. Enter your full “Email Address”
  2. Enter the password for your “Email Address”
  3. Tap “Next”
  4. Choose the type of email account you will be using.
    • POP3: POP3 will download the emails from the server and store them on your phone.
    • IMAP: IMAP will store the emails on the server and show a cached copy on your phone.
    • Exchange: Exchange is not supported as it requires a Microsoft Exchange server

Incoming Server Settings


  • Username: Please enter your full email address
  • Password: The password for your email address.
  • IMAP server: This is typically your domain name preceded by “mail.”. This can be found in the E-mail Accounts section of the cPanel, under “More” > “Configure Mail Client” .
  • Port:
      • Non Secure (No SSL): 143
      • Secure (SSL): 993
      • Note: Using

    “SSL (Accept all certificates)

       will be more compatible.
  • IMAP path prefix: Please enter INBOX. This will allow for you to store your Sent, Drafts and Deleted emails on the server.
  • Tap Next.

Outgoing Server Settings


  • SMTP server: This is typically your domain name preceded by “mail.”. This can be found in the E-mail Accounts section of the cPanel, under “More” > “Configure Mail Client” .
  • Port:
      • Non Secure (No SSL): 25 or 26
      • Secure (SSL): 465
      • Note: Using

    “SSL (Accept all certificates)

       will be more compatible.
  • Require sign-in Check this as you will need to authenticate with the SMTP server.
  • Username: Please enter your full email address
  • Password: The password for your email address.
  • Tap Next.

Account Options


  • Email Checking Frequency: Set how often you would like your device to check for new emails.
  • Note: The more often you check your email the more drain it will cause on your battery.

  • Send email from thise account by default Check this option if this will be your default email address
  • Notify me when email arrives: Leave this checked if you would like to be notified of new email messages.
  • Tap Next.

Name the account


  • If you would like you can name the email account, this can be helpful if you have multiple accounts on the one device.
  • Enter the name you would like to be shown on all outgoing emails that you send from the device.
  • Tap Done.

How to make your smartphones as Wifi Access point?

If your phone has a wifi feature, then maybe you have also a hotspot capability. Android phones has this feature, and here are the steps on how to activate it:

Most android smartphones can follow this steps.

  1. Go to your phone’s setting
  2. Choose Wireless and Networks
  3. Select Tethering and Portable hotspot
  4. Activate “Portable WiFi hotspot” by tapping the grayed check icon. It should turn green/yellow green if activated.
  5. Optional: You need to configure the name and security at Portable WiFi hotspot setting.

Paid Android Apps became FREE

Yes, you will no longer pay for any android apps. You should have a friend that bought a premium android app and teach them on how to share those Apps by following the steps below. Take note that normally after purchasing an android app, you cannot see the setup files and so you can never share it to anyone.

Here are my simple steps on how to hack paid android apps:

I. Installing the “Computer” App.

1. Using your android phone, connect it to 3G/WIFI.

2. Once you are connected, open Google Play Store, and search for the App named “Computer”. Or download HERE.

3. Download and Install it to you phone.

II. Transferring files via Bluetooth

1. Run the application “Computer”

2. Go to System Disk, and navigate to /mnt/asec

3. You are now in a folder that contains all installed applications

4. Select any game folder and open it.

5. Select the file with the extension name APK and click copy icon.

6. Paste it in any folder inside your sdcard.

7. Now, go to your “My Files”

8. Go to the folder where the file has been copied.

9. Long press the file and select share via bluetooth.

Note: The phone that receives the file can install now the App as long as the /settings/application/unknown sources is enabled.

This tutorial is very useful without spending penny in your 3G connection and also for without downloading any more the apps directly from the play store

Enjoy!

Content Protected Using Blog Protector By: PcDrome. & GeekyCube.