Posts Tagged ‘email’

How to setup Email in a Blackberry Device?

Source: JustHost.com

Setting Up Email for the Blackberry with the Blackberry 6 or 7 OS

You can definitely set up your Blackberry to use email.

  1. On the home screen, click the Setup icon.
  2. Select Email Accounts
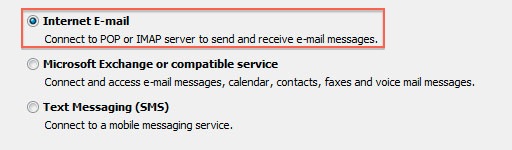
  3. Select Internet Mail Account
To complete the process, you will need to follow the phone’s prompts along with the information found in our article with “General Settings for any Email client”.

Setting Up Email for the Blackberry with the Blackberry v5 OS

  1. On the home screen, click the Setup icon.
  2. Select the Setup Wizard
  3. Select “I want to create or add an email address.”
To complete the process, you will need to follow the phone’s prompts along with the information found in our article with “General Settings for any Email client”.

Re-registering your Blackberry device

You may have to re-register your device with your wireless network. Its very easy to do this.

  1. Click the Blackberry button > Options.
  2. Advanced Options > Host Routing Table
  3. Click the Blackberry button and choose “Register Now”.

This should sync your PDA with your carriers wireless network.

Older models

If you create an email address with the same name as your cPanel user name, there can be a major conflict.

When you setup an account on BIS it asks for only 2 things, e-mail address and password and tries to guess the rest. Now normally this is fine because it’ll fail and ask for the real information, but because the email and username both exist, if the passwords are the same, Blackberry will accept that this data is correct, and sync the phone with the accounts default e-mail address instead of the email address.

The fix for this is ridiculously simple; just give Blackberry a false password. When it cannot authenticate it will then ask you if you want to“Re-enter account information” or “Enter the settings manually”.

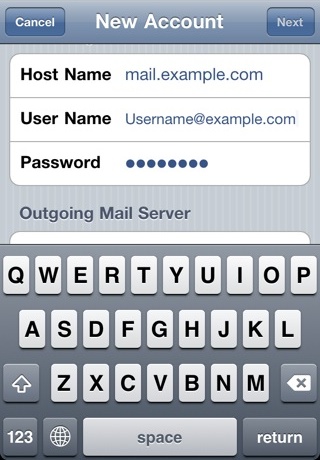
  1. Select Enter Settings Manually, then select “I will provide the settings to add this email account”.
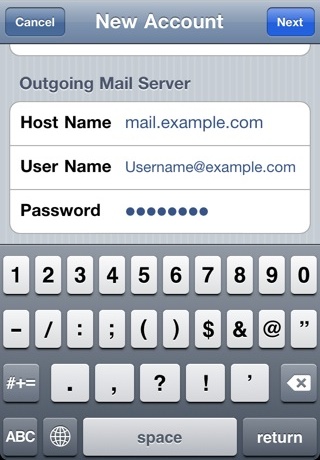
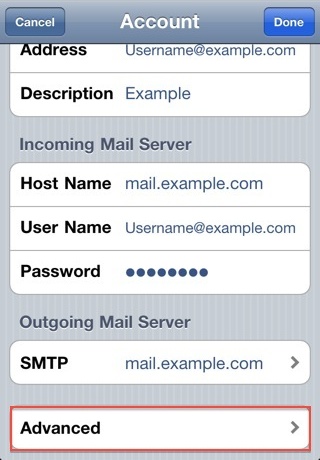
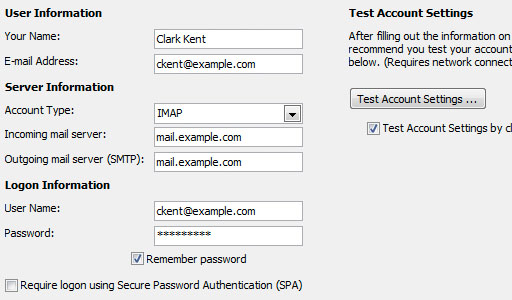
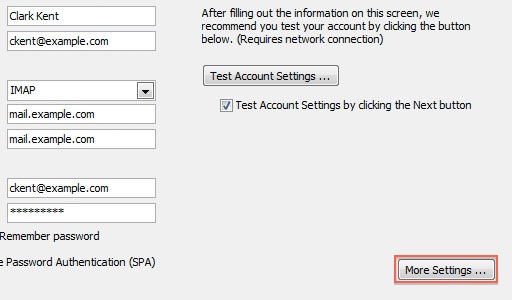
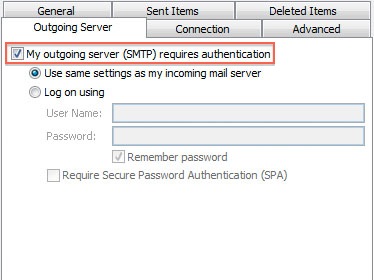
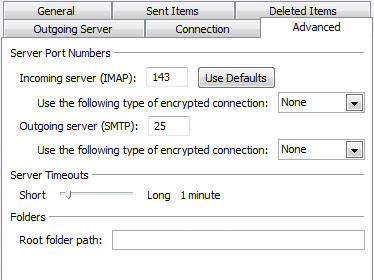
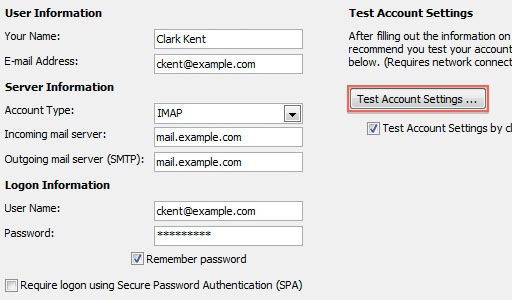
  2. Finally, enter the full IMAP information for your account.

This will cause BIS to sync with the proper account.

Note: In the new Blackberry OS this is not the case, and this fix may not apply to the newer OS. However, this is something to try if you’re stumped.

How to setup Email in iPhone or iPod Touch?

Source: JustHost.com

This article will show you how to setup email on your iPhone or iPod Touch. While the screen shots are from an iPhone they should work on any iOS device.

How to configure the iPhone,the iPod Touch


    1. Tap Settings
    2. Tap Mail, Contacts, Calendars


    1. Add Mail Account


    1. Choose Other


New Account Information


    1. Enter your Name
    2. Enter your email address as the Address
    3. Enter the password for your email address
    4. Tap Next

Incoming Mail Server


      • Host Name: This is typically your domain name preceded by “mail.”. This can be found in the E-mail Accounts section of the cPanel, under More > Configure Mail Client.
      • User Name: Your email address.
      • Password: The password for your email address.

        Outgoing Mail Server


      • Host Name: This is the same as the incoming server.
      • User Name: This is required and again is your email address.
      • Password: The password for your email address.
      • Tap Next.

Cannot Verify Server Identity

This error message it is due to the SSL certificate being used for the mail server is *.Justhost.com. To use the SSL Certificate simply click Continue.


How to store Sent, Drafts and Trash on the server

To do this please go to Settings > Mail, Contacts, Calendars

        1. Choose your email account
        2. Tap Advanced


        1. Under Mailbox Behaviors choose the mailbox you wish to configure.


        1. Choose the corresponding folder on the server you wish to save the email in.


        1. Repeat the above steps for any other folders you wish to store on the server.


How to Setup Outlook 2010?

How to Setup Outlook 2010

Source: JustHost.com

This guide will show step-by-step instructions for setting up E-mail on Outlook 2010 for Windows. While it can be used for other versions of Outlook, some screens and steps might vary.


Adding a new account:

    1. Select the ‘File’ menu.
      Add Account
    2. Select Info.
    1. Click the “Add Account” button.
    1. Choose to “Manually configure server settings” .
Manually Configure
    1. Click Next.
    2. Choose “Internet E-Mail” .
Manually Configure
  1. Click Next.


Account Settings:

Account Settings
    1. Please enter your name, as you want it to appear on your outbound E-mail messages.
    1. Please type your E-mail address.
    1. Enter your E-mail address for the User Name.
    1. Enter your E-mail password.
    1. Please enter your mail server. This can be found in the E-mail Accounts section of the cPanel under Configure Mail Client.
    1. The Outgoing Mail Server is the same as your incoming mail server.


More Settings

    1. Click the More Settings button.
More Settings
    1. Click the Outgoing Server tab.

Outgoing Server Tab

    1. Click the “My outgoing server (SMTP) requires authentication” checkbox.
    1. Make sure that it is using the same settings as your incoming mail server.
    1. Click the Advanced tab.
Advanced
    1. If you are using POP3 with SSL, please click the checkbox and select 995 for your port. Otherwise leave the port at 110.
    1. If you are using POP3, you may choose when messages are removed from the server.
    1. If you are using IMAP with SSL, please click the checkbox and select 993 for your port. Otherwise leave the port at 143.
    1. If you are using SMTP with SSL, please click the checkbox and select 465 for your port. Otherwise change the port to 26.
    1. Click the OK button.

Testing Settings

    1. While on the E-mail Accounts screen, click the Test Account Settings button.
Test Account Settings
    1. This will both check your settings and send a test E-mail to yourself to confirm that everything is working. If you receive any errors, please check your configuration.
    1. Click the Close button on the Test Account Settings window.
    1. Click Next on the E-mail Accounts window.
  1. Click the Finish button.

You should now be able to send and receive mail.

1 2

Content Protected Using Blog Protector By: PcDrome. & GeekyCube.