HostScripter Clients Through MailHostBox.
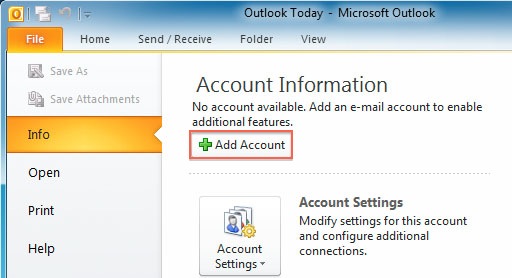
1. Click on the File tab, select Info, and then click on the Account Settings button and select Account Settings.

2. Click on New to add your Hover email address.
Outlook 2003: Select POP3 and click Next.
Outlook 2003: Select POP3 and click Next.

3.) Check the box for “Manually configure server settings or additional server types” & then click Next.

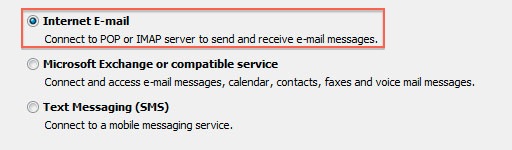
4.) Put the bullet next to “Internet E-mail” then click Next.

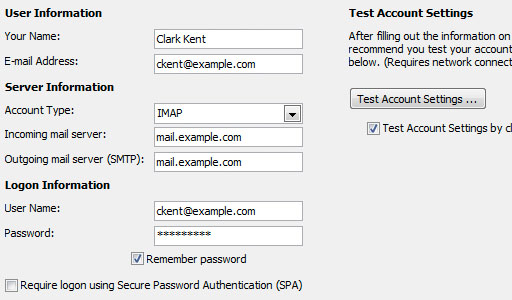
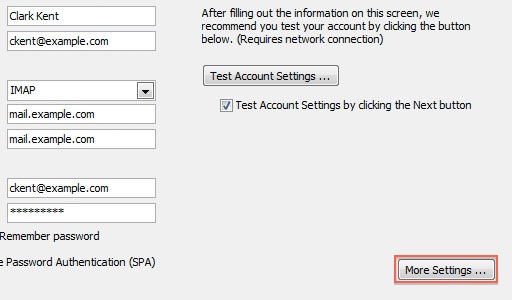
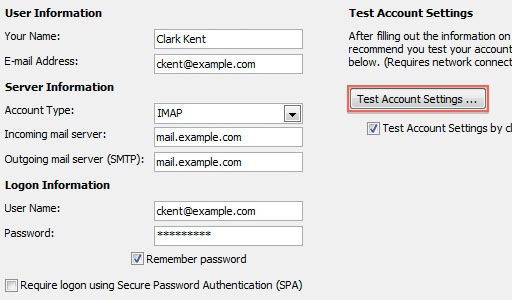
5.) Type in Your Name/E-mail Address, Incoming/Outgoing mail servers, User Name/Password
& then click More Settings.** Please note that the Domain Name used for the configuration here is ‘q.com’
& then click More Settings.** Please note that the Domain Name used for the configuration here is ‘q.com’
For Free Email Service / Email Hosting Plans
***For POP configuration
Account Type: POP
Incoming Mail Server: pop.your-domain-name (eg: pop.yourdomain.org)
Outgoing Mail Server: smtp.your-domain-name (eg: smtp.yourdomain.org)***For IMAP configuration,
Account Type: IMAP
Incoming Mail Server: imap.your-domain-name (eg: imap.yourdomain.org)
Outgoing Mail Server: smtp.your-domain-name (eg: smtp.yourdomain.org)

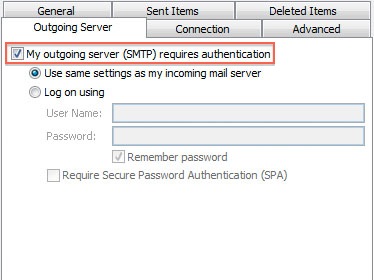
6.) On the Outgoing Server tab put a check mark next to “My outgoing server (SMTP) requires authentication”
& then put the bullet next to “Use same settings as my incoming mail server”.
& then put the bullet next to “Use same settings as my incoming mail server”.

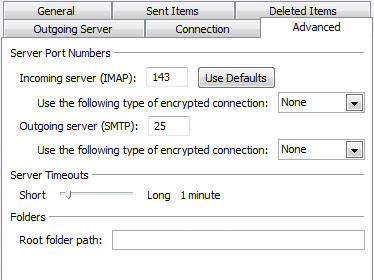
7.) On the Advanced tab change the Outgoing server (SMTP) port
to 587, change the encrypted connection to None & then click OK.Tick on Leave a copy of messages on server as per your preference.
to 587, change the encrypted connection to None & then click OK.Tick on Leave a copy of messages on server as per your preference.
***For POP configuration,
Incoming (POP) Server Port Number: 110
Outgoing (SMTP) Server Port Number: 587
***For IMAP configuration,
Incoming (IMAP) Server Port Number: 143
Outgoing (SMTP) Server Port Number: 587

8.) Click on Test Account Settings to test the configuration
Click Next.
Click Next.

9.) Click Finish.

10.) Click Close.

11.) Click Send/Receive to get your mail.
You have successfully configured your Email Address to your Email Client ‘Outlook Express’
You can try sending a Test Email and Test the Accounts Settings.
You can try sending a Test Email and Test the Accounts Settings.
Source: MailHostBox.com