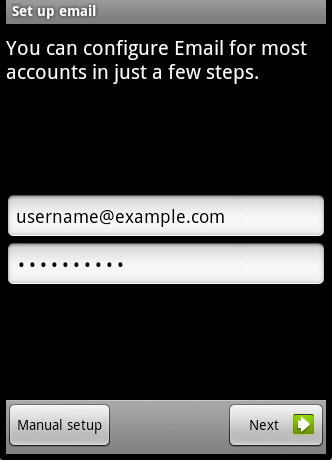
You are thinking if you can have an email address something like iam@handsome.com? or anything you want? Well, it is possible! Just follow this steps and consider my advices.
Firstly, before going into the procedures, you should have your own domain name (ex: erickabuzo.com). If you don’t have, you can buy one HERE.
Considering that you have your domain and cpanel account,
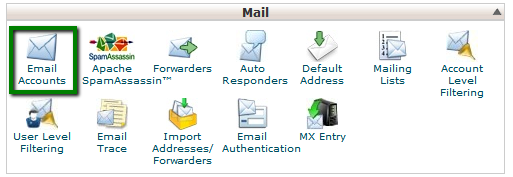
1. Log in to your cPanel > Mail section > Email Accounts menu:
2. If you have multiple domains, select the domain you want your email account to be associated with in the drop-down list in the top right corner and enter the desired email and a strong password of your choice:
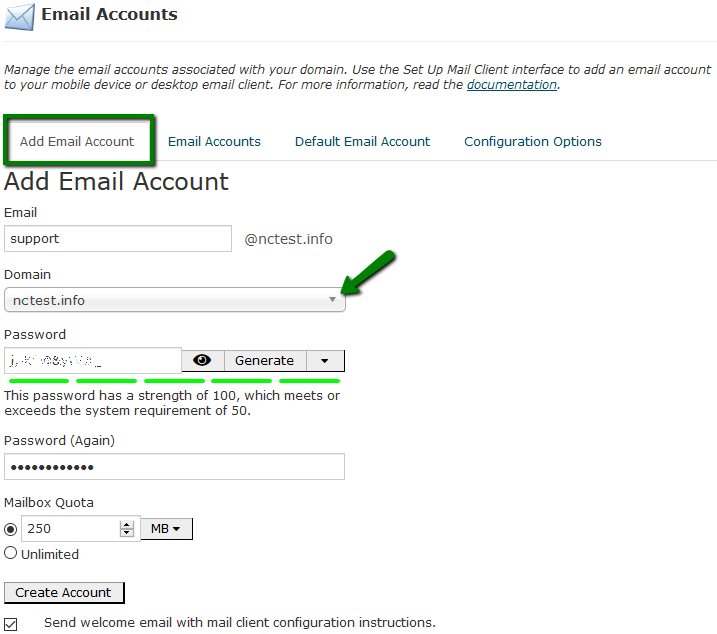
Click on Create Account once all is set.
3. To log in your own webmail, visit in your browser’s address bar:
http://www.yourdomain.com/webmail
4. Once done, you will see the icons of the three webmail interfaces:
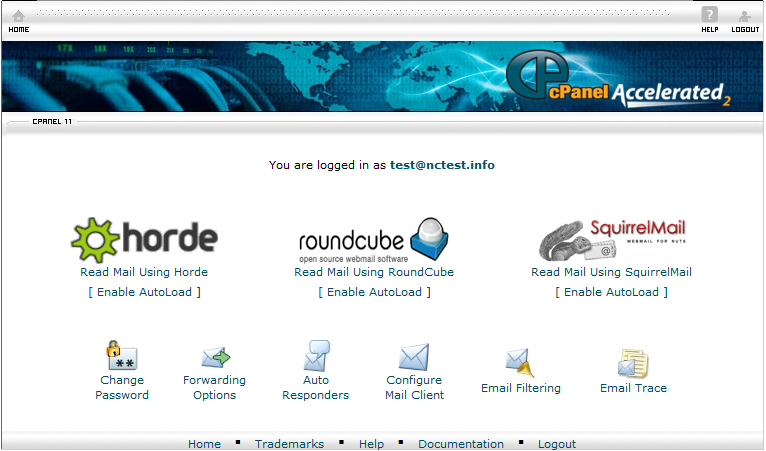
5. Feel free to choose any access webmail. I suggest Read Mail Using SquirrelMail. Get tips on teatteriyhdistysprovinssi